-(1280-x-720-px)-(6-x-4-cm)-(1000-x-800-px)-(1920-x-650-px)-(1000-x-800-px)-(1920-x-800-px)-(1000-x-800-px)-(1920-x-800-px)-(1280-x-800-px)-(1000-x-800-px)-(1920-x-650-px)-(1000-(convert.io-(42).webp)
Pisang Peak sits at 6,091 meters in the Manang district of the Annapurna region, rising directly above the village that shares its name. Locally it's known as Jong Ri, and on the map it sits tucked between the main Annapurna massif to the south and the drier, high-desert side valleys that lead toward Manang village and eventually Thorong La. Unlike most Himalayan peaks, which require a dedicated expedition-style approach, Pisang is classified by the Nepal Mountaineering Association as a Group B trekking peak, meaning it can be climbed with a standard climbing permit rather than a full mountaineering expedition permit, and without the months of planning a peak like Ama Dablam or Manaslu demands.
That classification is a big part of why it's become one of Nepal's most-climbed 6,000-meter peaks. It's one of the more approachable summits in the country, which is not the same thing as saying it's easy. Trekkers with strong high-altitude trekking experience can do it. Complete beginners to mountaineering usually find the last 300 meters humbling.
This guide breaks down what the climb actually involves, what it costs, the permits you'll need, and a realistic itinerary, so you can decide if it fits your season, your fitness, and your budget.
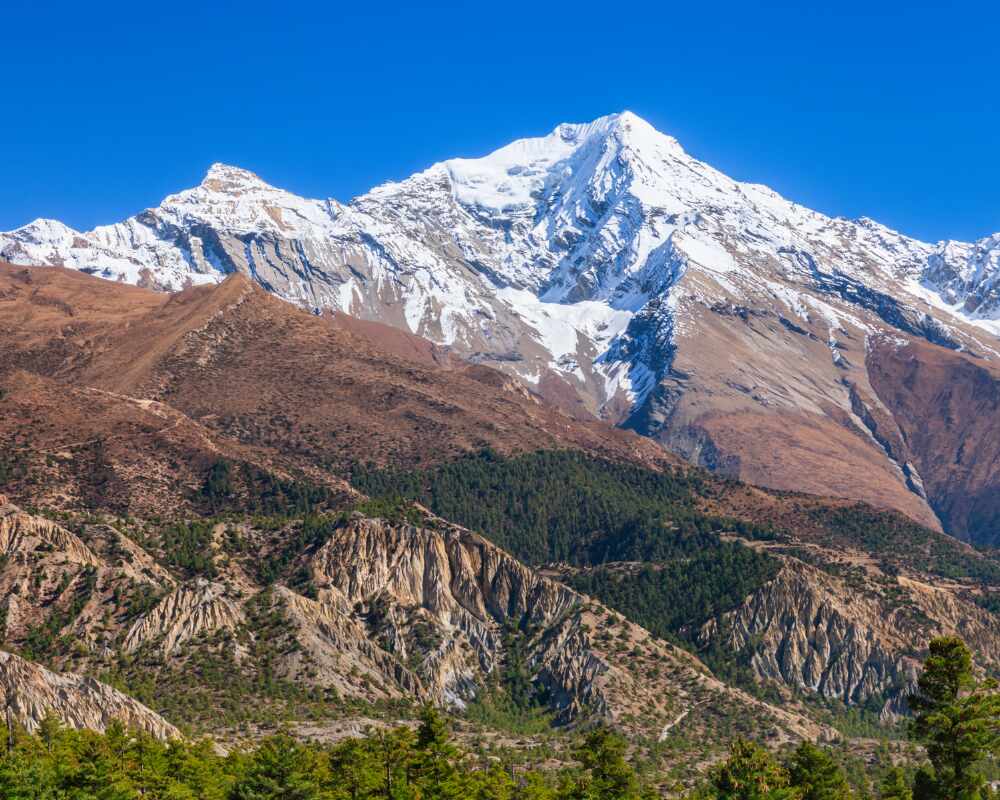
Quick Summary: Pisang Peak Climbing at a Glance
Before getting into the detail, here's the shape of the whole trip in one table. Use it to sanity-check the climb against your own timeline and fitness before reading further.
| Category | Details |
|---|---|
| Elevation | 6,091 m (19,983 ft) |
| Peak classification | NMA Trekking Peak, Group B |
| Region | Manang, Annapurna |
| Trip duration | 16–18 days for a climbing-only package; up to 23 days when combined with the full Annapurna Circuit and Thorong La crossing |
| Trekking days to base camp | 7–8 days via Besisahar, Chame, and Pisang village |
| Base camp altitude | 4,420 m |
| High camp altitude | 5,450 m |
| Summit push | 6–8 hours up, 3–4 hours down |
| Difficulty | Moderate to strenuous; non-technical trekking peak with one technical section near the summit |
| Best seasons | March–May, September–November |
| Group size for best value | 2–15 climbers, with better per-person pricing above 6 |
| Starting cost | From around USD 2,099 per person for a full guided package, including permits |
| Success rate (guided, prepared climbers) | Roughly 70–80% |
| Prior experience needed | High-altitude trekking essential; prior technical climbing helpful but not mandatory |
Now let's go through why each of those numbers is what it is.
What Makes Pisang Peak Worth Climbing
Pisang Peak (also called Jong Ri by locals) rises above the Manang valley on the Annapurna Circuit, which means you get two trips folded into one: the classic teahouse trek through Manang's dry, high-desert landscape, plus a genuine mountaineering objective with crampons, ice axe, and a rope team on summit day.
The summit ridge gives you a close-up look at Annapurna II, Annapurna IV, Gangapurna, and Tilicho Peak, all lined up across the valley. On a clear morning, that panorama alone answers why people choose this peak over the higher-traffic Island Peak in Khumbu. There's also a practical reason it's popular: because it sits directly off the Annapurna Circuit trail, you don't need a separate long approach trek the way you do for peaks like Mera or Lobuche. You're already walking past it.
That accessibility is a double-edged sword, though. Because Pisang looks close and manageable from the valley floor, some trekkers underestimate it and show up without the acclimatization or gear they actually need. The peak forgives poor planning less often than its reputation suggests.
Is Pisang Peak Worth Climbing?
For the right trekker, yes, and the reasoning is fairly specific. If you've already done a demanding trek like Everest Base Camp or the full Annapurna Circuit and want to know what it feels like to stand on top of something rather than just walk past it, Pisang gives you that experience without committing to a full expedition-style peak like Ama Dablam or Manaslu. It's also one of the few 6,000-meter summits in Nepal achievable within a standard three-week trip, permits included.
Where it's not worth it: if you're looking for a technical alpine challenge, or if this is your first time above 4,000 meters. In both cases, you'd be better served by a different objective, either a more technical peak with proper mountaineering routes if you want technical climbing, or a straightforward high-altitude trek first if you want to test how your body handles thin air before committing to summit-day logistics.
Permits Required for Pisang Peak Climbing
Climbing Pisang Peak legally requires more than a single permit, and it's worth understanding what each one covers before you budget or book.
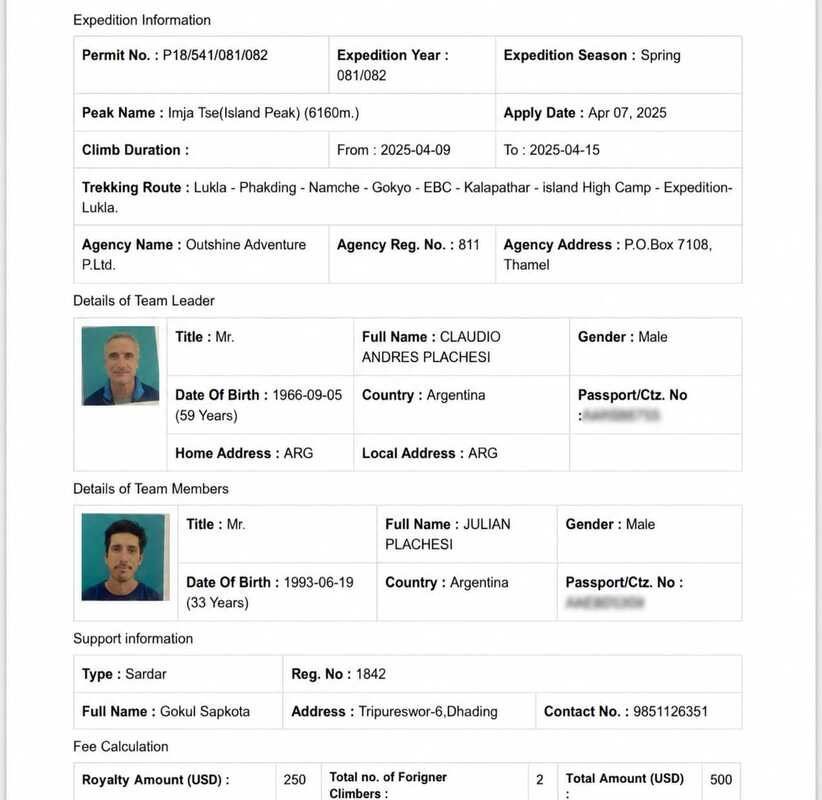
NMA Climbing Permit:
Issued by the Nepal Mountaineering Association, this is the permit specific to the summit itself. Pisang falls under Group B trekking peaks, which keeps the fee lower than technical expedition peaks, and the price is tiered by season, with spring and autumn costing more than winter or monsoon.
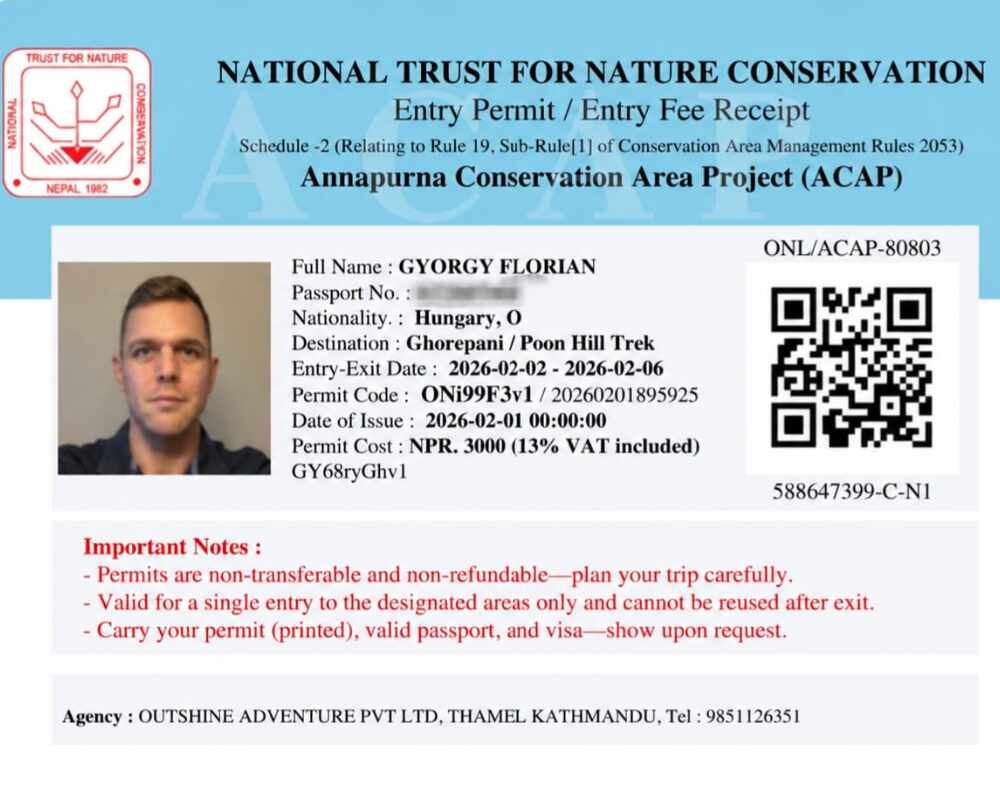
Annapurna Conservation Area Permit (ACAP):
Required for anyone entering the conservation area, whether they're summiting a peak or simply trekking through Manang. This is checked at multiple posts along the route.
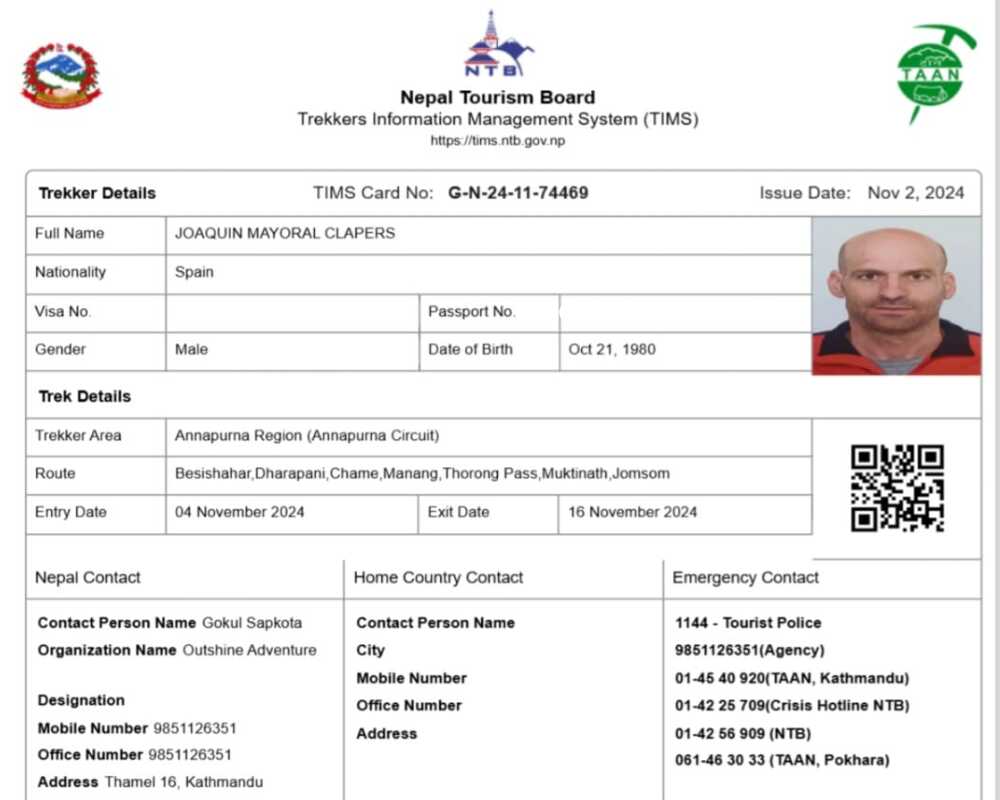
TIMS Card:
Nepal's trekker information system card, generally arranged by your operator alongside the ACAP.
Garbage Deposit:
- A refundable fee held by the NMA and returned once your team confirms it packed out its waste from base camp and high camp.
A licensed climbing guide is mandatory for Pisang Peak, not optional, and this is a stricter requirement than on the standard trekking sections of the Annapurna Circuit. Since 2023, Nepal has also required a licensed guide for foreign trekkers on the Annapurna Circuit itself, a rule explained in more detail in this breakdown of guide requirements on the Annapurna Circuit. For a peak climb involving glacier travel, rope work, and crevasse navigation, that requirement matters even more, since a guide here isn't just handling logistics but making real-time safety calls above 5,000 meters.
Permits are arranged in Kathmandu before you head out, and there's no facility to buy the NMA climbing permit on the trail itself, so this isn't something to leave until the last minute.
How Difficult Is Pisang Peak Climbing
This is where a lot of blogs get vague, so let's break the climb into its actual sections instead of calling the whole thing "moderate" and leaving it there.
Pisang Village to Base Camp
The approach trail is well-trodden and non-technical. You're walking through pine forest and open ridgeline, gaining altitude steadily but not aggressively. Most trekkers find this stretch genuinely enjoyable rather than punishing, and it's a good chance to test your legs and appetite before the terrain gets serious.
Base Camp to High Camp
This is where the character of the trip changes. You gain roughly 1,000 meters over loose scree, rock slabs, and unstable ground with no clearly fixed trail. Footing is unreliable, the wind picks up noticeably above 5,000m, and there's a real risk of rockfall if a group ahead of you dislodges loose stone. Trekking poles help a lot here, and pacing matters more than raw fitness, people who charge this section too fast tend to arrive at high camp depleted before the part that actually needs their energy.
High Camp to Summit
From high camp, you're on a glacier. Expect a 30 to 45 degree snow slope near the top, crevasses that need careful navigation with a rope team, and a short but exposed rock and ice section just before the final summit ridge, where guides fix ropes for climbers to ascend using a jumar. It's not technical climbing in the rock-climbing sense, but it demands comfort moving with crampons, basic rope-work competence, and the ability to keep functioning at altitude on legs that have already worked hard for a week.
Altitude is the real difficulty here, not the terrain itself. Summit day typically starts around 2 to 3am, in the dark, in temperatures that can drop below minus 15°C at high camp before windchill. You're pushing through the kind of fatigue that hits most people the first time they cross 5,500m, where every step above that line takes noticeably more effort and concentration than it did the day before.
- No prior technical climbing experience is required, but basic crampon and ice axe training, usually given at base camp, is essential
- Prior trekking peaks or high-altitude treks like Everest Base Camp, Mera Peak, or the Annapurna Circuit itself help enormously with pacing and confidence
- A summit success rate of roughly 70 to 80 percent is typical for prepared climbers on a well-guided trip, with weather and altitude sickness being the two most common reasons for turning back
- Physical training beforehand should focus on cardiovascular endurance and leg strength, not gym-style bulk; think long hikes with a loaded pack rather than heavy squats
Pisang Peak vs Other Popular Peak Climbing in Nepal
Pisang isn't the only trekking peak worth considering, and how it stacks up against the others usually comes down to altitude, technical difficulty, and how it fits your existing trip.
| Peak | Elevation | Difficulty | Duration | Technical Section | Best Paired With |
|---|---|---|---|---|---|
(full circuit combo) | 6,091 m | Moderate–Strenuous | 22–23 days | Short glacier and rope section near summit | Annapurna Circuit |
| Island Peak | 6,189 m | Strenuous | 17–19 days | Steep headwall with fixed ropes | Everest Base Camp |
| Mera Peak | 6,476 m | Moderate–Strenuous | 18–20 days | Mostly non-technical, glacier walk to summit | Standalone trek |
| Lobuche Peak | 6,119 m | Strenuous | 17–19 days | Steep, exposed final ridge, more technical than Pisang | Everest Base Camp |
| Yala Peak | 5,732 m | Easy–Moderate | 10–12 days | Minimal, good first trekking peak | Langtang Valley |
Pisang sits comfortably in the middle of this group: higher and more involved than a beginner peak like Yala, but less technically demanding on summit day than Lobuche or Island Peak. Its biggest advantage is logistical rather than technical, since it sits directly on the Annapurna Circuit route rather than requiring a separate approach trek.
Pisang Peak Climbing Itinerary
Most operators run this as a 16 to 18 day package from Kathmandu, including acclimatization days that people are tempted to skip and shouldn't. Here's a realistic day-by-day breakdown with what actually happens on each stage, not just the altitude number.
| Day | Route | Altitude | Notes |
|---|---|---|---|
| 1 | Arrive Kathmandu | 1,345m | Airport transfer, hotel check-in |
| 2 | Pre-trip briefing and Kathmandu sightseeing | 1,345m | Permit paperwork and gear check happen around this day |
| 3 | Drive to Besisahar | 830m | 7-hour bus journey, the start of the trail proper |
| 4 | Trek to Bahundanda | 1,310m | 5 hours, terraced farmland and the first real climbing of the trip |
| 5 | Trek to Chamje | 1,400m | 5 hours, riverside trail through forest |
| 6 | Trek to Bagarchhap | 2,160m | 5 hours, landscape starts turning drier and more alpine |
| 7 | Trek to Chame | 2,630m | 5 hours, district headquarters of Manang with hot springs |
| 8 | Trek to Pisang village | 3,300m | 5 hours, first close-up views of the peak itself |
| 9 | Acclimatization day at Pisang | 3,300m | Short exploration hikes, important before pushing higher |
| 10 | Trek to Pisang Peak Base Camp | 4,420m | 6 hours, steep climb off the main circuit trail |
| 11 | Base Camp to High Camp | 5,450m | 6 hours, rocky and exposed, the toughest non-summit day |
| 12 | Acclimatization at High Camp | 5,450m | Rest and short exploration before the push |
| 13 | Summit day, return to Base Camp | 6,091m → 4,420m | Pre-dawn start, technical rope section near the top |
| 14 | Spare day | — | Held in reserve for bad weather |
| 15 | Trek back to Pisang village | 3,300m | 5 hours, descent and decompression |
| 16 | Trek to Manang | 3,500m | 6 hours, rejoining the main circuit route |
| 17 | Trek to Yak Kharka | 4,000m | 5 hours, thinning trees and open valley |
| 18 | Trek to Thorong Phedi | 4,450m | 5 hours, staging point below the pass |
| 19 | Cross Thorong La, descend to Muktinath | 5,416m → 3,800m | 7 hours, the circuit's high point and a long day |
| 20 | Trek to Jomsom | 2,715m | 5 hours, into the Kali Gandaki valley |
| 21 | Fly to Pokhara | 827m | Short scenic flight from Jomsom |
| 22 | Drive to Kathmandu | 1,345m | 7-hour tourist bus |
| 23 | Final departure | — | Airport transfer |
Treat this as a planning table rather than a fixed quote your actual numbers will move with season, group size, and how much of the technical gear you already own. It's worth noting that the days spent walking from Kathmandu to Chame and Pisang village follow the exact same trail as the standard Annapurna Circuit, so if you want a line-by-line sense of what teahouse food, lodging, and transport cost on those specific days, the complete Annapurna Circuit trek cost breakdown covers that ground in more detail than fits here, since it's written for the trekking-only version of the same route.
Below is a explanation of where that money actually goes.
Permit and Government Fees
Every trekking peak in Nepal requires a climbing permit issued through the Nepal Mountaineering Association, priced by season and by which "group" the peak falls under, as covered above. On top of that, climbers need an Annapurna Conservation Area Permit and a TIMS card, both standard for anyone trekking in the region regardless of whether they're summiting anything.
Guide and Porter Costs
This is usually the largest line item after the permit, and it's not the place to cut corners. A qualified climbing guide, distinct from a standard trekking guide, is trained in rope work, crevasse rescue, and high-altitude decision-making, and that training is exactly what you're paying for on summit day. Porters carry group gear up to base camp; above that, climbers typically carry their own summit-day kit.
How Group Size Affects Your Cost
Group size is the single biggest lever on your per-person price, and it plays out differently depending on which type of group you fall into.
Solo climbers: Climbing alone means absorbing costs that are normally split. The NMA Group B permit is priced per team of up to four, roughly $350 in peak season, so a solo climber pays that full block fee alone rather than a quarter of it. A climbing guide's daily rate also stays largely fixed whether they're leading one person or four, and a private jeep from Kathmandu to Chame costs the same regardless of how many seats are filled. Add these together and a solo climber can end up paying close to double what someone in a group of four pays per person, even though the route, guide quality, and duration are identical.
Pairs and small groups (2–3 climbers): This is where costs start dropping meaningfully. Two or three climbers split the same fixed permit block, guide fee, and jeep cost, cutting the per-person burden roughly in half compared to going solo, though not yet down to the best available rate. This size also tends to feel more personal on the mountain, since you're not waiting on a larger group's pace during the scree section or the summit push.
Groups of four to six: This is the sweet spot most operators price around, and for good reason. Four climbers fill the NMA permit's base block exactly, so nobody is paying for unused capacity, and the guide, porter, and transport costs spread across the most people without needing a second guide or a larger, pricier vehicle. Beyond six, some of that saving reverses, since larger teams often need a second climbing guide for safety on the glacier, which adds a cost line back in even as the per-person permit fee keeps dropping.
Gear Rental vs Buying
Most reputable operators can supply or rent the technical gear, crampons, harness, ice axe, and rope hardware, for a daily fee that's almost always cheaper than buying equipment you might use once. It's worth asking exactly what's included in your quoted price before assuming any of this is covered, since "gear provided" sometimes means only group climbing equipment like ropes and tents, not personal items like your harness or crampons.
Trimming the Budget Without Cutting Safety
A few of the same cost-saving principles that apply to trekking the Annapurna Circuit apply here too, since the approach to Pisang follows the same trail. Traveling with three or four other climbers to split guide and transport costs, renting technical gear instead of buying it, and carrying a reusable water bottle instead of buying bottled water at altitude all make a real dent in the total. For a fuller rundown of these tactics on the broader route, this guide on reducing trekking costs on the Annapurna Circuit covers the same ground in more depth. And since Pisang's approach trek overlaps with the standard circuit itinerary almost entirely, the complete Annapurna Circuit trek cost breakdown is a useful reference for what teahouse, food, and transport costs look like on the days before you branch off toward base camp.
Best Season for Pisang Peak Climbing
Weather makes or breaks a summit attempt here more than fitness does, so timing your trip correctly matters as much as training for it.
- Spring (April to May): Stable weather, warmer daytime temperatures, and good visibility before monsoon clouds start building over the range
- Autumn (late September to November): The most popular window, with crisp air and generally the clearest mountain views of the year, though high camp nights get colder as the season progresses
- Winter (December to February): Technically possible but brutally cold at high camp, with a much lower success rate and shorter daylight windows for the summit push
- Monsoon (June to August): Avoid this window entirely; snow bridges on the glacier become unstable, visibility drops to near zero on most days, and the approach trails turn to mud
Autumn tends to book out fastest, so if you're eyeing October, get your permits and guide arranged at least two to three months out. Spring bookings move a little slower but the same logic applies, since guide availability for the popular weeks fills up early.
What to Pack for Pisang Peak Climbing
Base camp gear and trekking gear are two different categories, and packing light on the wrong item can genuinely end your summit attempt rather than just make you uncomfortable.
- Insulated mountaineering boots, with double boots recommended above high camp for the coldest hours before dawn
- 12-point crampons and a general mountaineering ice axe, sized correctly for your height and boots
- A climbing harness, ascender, and figure-8 descender for the fixed rope sections near the summit
- A down suit or heavyweight down jacket rated for at least minus 20°C, since high camp nights are colder than most people expect
- Trekking poles for the scree section between base camp and high camp, where stable footing matters more than speed
- A headtorch with spare batteries kept warm in an inner pocket, since summit day starts well before sunrise
- Sunglasses or glacier goggles rated for high-altitude UV, needed even on cloudy summit mornings
Most reputable operators supply or rent the technical climbing gear listed above, so check exactly what's included before you buy a 600-dollar down suit you'll use once. A quick call or email to your operator asking for an itemized gear list, split into "provided" and "bring your own," saves both money and packing stress.
Frequently Asked Questions
Do I need previous climbing experience for Pisang Peak? No technical climbing background is required, but you do need solid high-altitude trekking experience. Anyone who has completed a demanding trek like Everest Base Camp, Annapurna Circuit, or Manaslu Circuit has the fitness base needed. Crampon and rope basics are taught on-site before summit day.
How cold does it get on summit night? High camp temperatures commonly drop below minus 15°C before windchill, and summit morning starts around 2 to 3am in the dark. A sleeping system and down layers rated for genuinely cold conditions aren't optional here.
Can I climb Pisang Peak without a guide? No. A licensed climbing guide is mandatory for NMA trekking peaks, including Pisang, and this requirement is enforced more strictly than on standard trekking routes given the glacier travel and rope work involved on summit day.
How does Pisang Peak compare to Island Peak? Both sit around 6,100 to 6,200 meters and involve a similar mix of glacier travel and a short technical section near the summit. Pisang's main advantage is logistics, since it sits directly on the Annapurna Circuit rather than requiring the Everest region's Lukla flight and longer approach.
What's the biggest reason people don't summit? Weather, followed by altitude-related fatigue. Technical difficulty and fitness are rarely the limiting factor; a bad forecast window without a buffer day is the most common reason groups turn back.
Is travel insurance required? Yes, and it needs to explicitly cover high-altitude mountaineering and helicopter evacuation, not just standard trekking. Standard travel insurance policies frequently exclude activity above certain altitude thresholds, so check the fine print before you buy.
Ready to Plan Your Climb
Pisang Peak packs a genuine 6,000-meter summit into a three-week trip: a scenic non-technical approach through Manang, a tough scree climb from base camp to high camp, and a pre-dawn glacier push with one short guided technical section near the top. None of that is a reason to avoid it, it's a reason to prepare properly. Get your acclimatization right, don't skip the buffer day, budget honestly for permits and a qualified guide, and pick spring or autumn for your best odds against the weather. Do that, and it's well within reach for anyone already comfortable on a demanding high-altitude trek.
Pisang Peak rewards people who respect it and treat summit day as the serious mountaineering objective it is, not a bonus stop tacked onto a trekking holiday. Get your acclimatization right, budget honestly for permits and a qualified guide, and pick a season that doesn't fight you on weather.
If you're working out dates, group size, or which itinerary fits your timeline, our Outshine Adventure team can walk you through a route plan built around your fitness level and travel window. Whether you're planning a trek or adding an adventure like Pisang Peak Climbing to your Nepal itinerary, we'll help you understand the route, logistics, and requirements, no pressure, just the details you need to book with confidence. Contact us.
.webp)